
Operation PNW
The winter, fall and spring months this past year have been very busy between the coming home, the holidays and then interviewing. There were a number of interesting roles I found, and ultimately accepted an infrastructure engineering position up in the Seattle area during the spring. This decision is obviously caused the chaos to continue with living-out-of-a-duffle-bag routine for a bit longer, but now I’m settled and mostly unpacked in a permanent location.
As much as I’m already missing the California beauty (figures Tahoe and a Yosemite valley get good snowstorms after I leave!), there is a lot to offer in the region up here. Some my favorites in previous visits include the beautiful, rugged Olympic coastline, temperate rainforests and of course the famous wildflower blooms on Rainier. I’m particularly partial to the latter, so really looking forward to the next month or two as the winter snows melt out. And to much of my surprise, there was an entirely unknown-to-me National Park up here as well: we camped at North Cascades NP last weekend and were thoroughly impressed with the place. It’s quite steep and intense terrain, especially in the high country (and still snowed in currently), but with easier access then the Sierras. Doing a bit of quick Googling revealed a plethora of high alpine lakes and stunning vistas available. Definitely looking forward to exploring all of these places more.
Beyond that, I’m actually looking forward to the colder climate. Some (many?) people think I’m nuts, but I miss having snow where I live, rather then having to drive hours to find it. And as a result, I can grab my snowboard and be on the slopes within 45 min. I would routinely go boarding on winter weeknights back east when I was first learning. After going up to Snoqualmie Pass on several mid-week visits this winter, it reminded me how much I missed having access to this!
My original plan when departing the east coast was to move up here. I wouldn’t change that decision, but happy that I finally was able to make this happen!
Thanksgiving Wrap-Up
 It’s been a few weeks now since finally home. The Death Valley & Joshua Tree visit over Thanksgiving was awesome, but that’s about it for the travelling in the near term (except for Tahoe of course, assuming we will actually get some snow). Death Valley was quite an adventure, starting with a sandstorm blowing in as we were pulling into camp. Glad I had the Anjan with me, it was so fierce that I “slept” through an night, while a nice layer of dust was collecting on my face and small dunes were growing inside the tent. I don’t even think the REI would have survived long-term after 110 evenings this year, and even if so, it would have been even more uncomfortable.
The rest of the time in DEVA was pretty awesome, great weather and even some pretty impressive sunsets & rises. It was my second time in the park, though the first was just a few hours at the Ibex Dunes with a severely swollen ankle and lots of pain back in March. JTree was equally awesome. Got a bit of outdoor climbing in, introduced to a number of famous routes and even managed to get up a 5.9 which is way above my usual outdoor level. On top of that, I dare say that the sunsets there were even better then DEVA, at the minimum more numerous. This Joshua Tree visit was also my second time to this park, and likewise the first consisting of a few hours just hiking near trashcan rock.
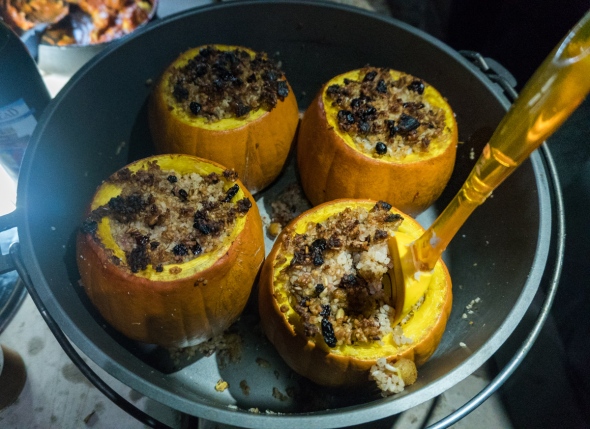
Beyond that, it was great to see some friends and finally experience the CHAOS Thanksgiving excursion. And it was a great opportunity to test some higher-scale recipes in my large dutch oven. It’s difficult to utilize normally since it makes such a large amount of food and typically camp with just 2-3 people. I didn’t pick a typical recipe though, I opted to try a slightly modified pumpkin roasted rice recipe, which came out awesome.
All-in-all, a good way to wrap up a solid few months of camping & travel. There’s certainly been a good number of highlights:
- Banff, Alaska & Green Tortoise adventures (breathtaking destinations with awesome people)
- The southwest, several times (all I can say is, damn)
- A chance to visit a number of national parks a second (or first) time, spending a few days to get to know the place
- On the longest and last journey to the east coast, visiting a lot of old friends & family
- Visiting new family now much closer by in Colorado!
- A solar eclipse!
- Other significant life milestones 🙂
Then, a few disappointments!
- Bad ankle sprain beginning of year in March – definitely put a significant damper on the amount & intensity of hiking and other podiatrically-demanding activities
- Arriving too late to the wildflower blooms at Mount Rainier – a nasty record-breaking heatwave hit the area with temps over 100, combined with a fairly significant dry-spell just destroyed the blooms. Out of the entire Paradise area, there were 2 small spots with decent flowers.
- But without question, the biggest one had to be the northeast fall foliage season. The months preceding it were basically color-perfect weather. As the September weeks progressed, the colors started to come slightly early, when suddenly (again) a record-breaking heatwave blasted through the region completely muting the colors. What came after was weeks-delayed watered-down foliage color overall. Here and there, a few small areas and trees put on a somewhat better show but generally it was a several-years worst foliage season.
You win some, you lose some, right? 🙂
Firestarting 101
The process is easy, yet frequently misunderstood. Fire needs 3 things: oxygen, fuel and heat.
Preparation for building a campfire:
- Use the right tools for the job. Yes, a lighter can work. But they frequently break, run out of fuel, etc. Get a proper flint & steel, ideally with a magnesium stick. And when I say proper, I mean not one of those $5 survival trinkets. Get a flint several inches long, thick enough to not break and a good steel for striking and then PRACTICE using it. I stumbled across the impressive FireSteel (apparently used by US Military, no affiliation), mine is 3/8″ x 5″ which is works amazingly well. Since I don’t have a softbox stashed away in my camping gear, you get an in-the-field shot instead.
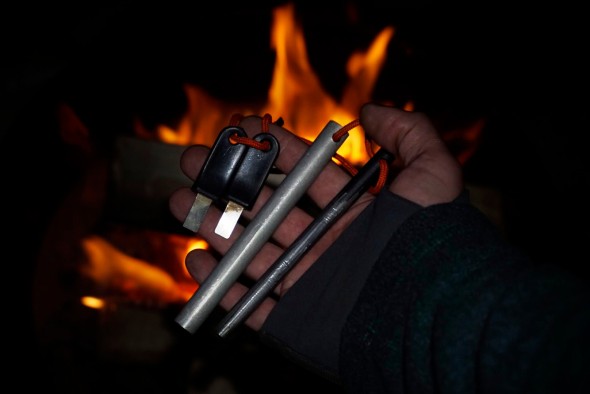
Mas fuego
- Get an axe, preferably two. I have a small tactical axe and it works well for simple jobs, but fails to split all but the smallest logs – even with a full overhead swing, there’s just not enough momentum to split anything decently sized. A small, sharp one (similar to what I have) and a large, heavy log splitter would be perfect. Oh, and learn to use these too.

- Prepare your fuel. You will need a range of sizes of wood to properly prepare for a fire. This is your tinder, kindling and larger logs.
- Tinder is DRY, light and fluffy. Something that is easily lit, not wet or compacted. My preferred source is dryer lint and I have a ziplock bag full of it in my camping supplies. I save it from doing laundry at home, or in a pinch run into a laundromat and raid all the dryer trays… you might get a few looks, but it works. Other examples include dried grass, wood shaving and certain types of bark. This is the MOST important fuel.
- Kindling is the size of smaller sticks, no bigger then a pencil. I make mine with the axe: looking for sharp angles on the edges of firewood bundles, then hacking away to make various-sized piles of shavings from tiny matchsticks to cue-sized splits off of a larger log (this is used after the kindling). DRY tinder should SNAP in half with your hands (as opposed to be wet and bending or too large to break with your hands)
- I like to have slightly larger sizes as well, a minimal amount is usually required here. Cue-stick to flute-sized pieces here.
- The first few times you do this, sort these out into separate piles; it’ll make your job a lot easier.
Now prepare your campfire. There’s many different styles and ways you can go about building it once it’s bigger, but start off simple.
- Start with a pile of your DRY tinder (a bit smaller then a ping-pong ball if you are new), fluff it up and place on dry-ish ground, or even better on a single or between two logs. Make sure air can get to it easily (not shoved underneath or tightly between other wood). A way that usually works well is to lie a larger sized log in your campfire ring, then place the tinder next to it on the ground.
- Bring your flint next to the tinder and strike! This should be easy… you did practice, didn’t you? If it doesn’t light either your tinder is wet, your flint (or you) can’t make a good spark, or your flint is too far away – it should be CLOSE so the sparks can easily land on the tinder while still hot and burning. If things are prepared correctly, it usually only takes me a single strike to get it lit.
- Gather your smallest piece of kindling (no bigger then matchstick) and lay on your burning tinder. Small pieces and SLOWLY! You do not want to suffocate the fire, which is very easy to do at this point. Add a few of your smallest and wait until they light. After a few seconds and they are burning, then add slightly larger but again be careful not to suffocate. The fire is most fragile when it’s small.
- Get to know the balancing act between feeding the fire enough to fuel to stay alive, but not smother it. A trick I learned is to try and expose new fuel to as much heat as possible (close to the flames), but without laying it directly on the flames (this tends to suffocate it). You can use other pieces of wood to prop up others you want to burn, which is why I suggested laying your tinder next to a large log, you can lay small pieces against the large log above the tinder and being close to the flames, but not directly laying on the tinder. A small gap goes a long way.
That about sums up. It may seem like a lot, but when you make fires regularly having the proper equipment makes the job simple.
Traveling, Research & Planning
I wanted to make a post about tips and tricksies I’ve learned in my travels over the years, specifically the past few months. Pretty high-level here, aiming at relatively inexperienced travelers that are willing to rough it out. I’ll add in a few notes for my specific current destination – New England.
Preparation tips
- Do research and determine your “hotspot” areas – this is a list of your must-see spots. Learn a bit about them, and more importantly where they are from a geographical perspective.
- Get a good road map for your destination area. The Delorme road atlas ones work pretty well. This is for those guaranteed spots where you will not have reception.
- As a second/backup option to #2, download Google map offline data for your destination. You can do this within the mobile app (Menu, Offline maps, Select your own map, then zoom to an area large enough to cover your region)
- Find lodging along your routes/areas, assuming you’ll be doing more then a day-trip. I typically camp as it’s 1. cheap & 2. relatively-easy to find last-minute. If you are sleeping in a car and not bothering with tenting, then just finding a pull-out or remote area will typically work, especially if you are in BLM land (which is plentiful in the west; you can “dispersed camp” anywhere on BLM land). I prefer established campgrounds myself to have a picnic table, a fire ring and in many cases showers.
Once you have done the above research/prep tips, the most important tasks are done. But to make things easier, I’d recommend doing a few extra steps. You don’t have to do any of these, but having at least one definitely helps.
- Add the above data to Google maps. This is most easily performed via the Google maps website. You can add destinations either as “starred” items (these will appear under “Your Places”, then “Saved”), or a custom map (“Your Places”, “Maps”, “Create Map”), or a combination of the two. Be aware that any custom maps are not available offline (without a data connection), but saved/starred places will work offline. It is your choice, I generally do a hybrid approach with both – creating scenic drives with custom maps, then must-see items as starred. I find it easier to look at a broad zoomed-out map with a list of drives highlighted, but the no-offline access is a challenge. You can alternatively take a screenshot to save when there is no access, of course you can’t zoom or navigate around but it’s better then nothing.

One of my custom maps
- Add the above data to your road map/atlas. This has the benefit of being fully offline and free of any electronics. You’d have to mark-up the map though, so might want to double-check before doing on a map you borrowed!
- If there will be a lot of driving, make a playlist or even better download some audiobooks to your phone! I’m a big fan of audiobooks on road trips, especially interesting fictional epics as they help to distract you from the miles passing by. Smart AudioBook Player is an excellent Android app for this, I’ve heard you can use iTunes on an Apple device but have never tried.
- If you plan on doing an extended road trip (requiring charging multiple electronics), I’d recommend making a charging “station”. An 12v car inverter, pegboard and some zipties will handle the job and having this set up makes your job much easier. Charge when needed, or have 2 sets of batteries for each device, leave one in the charger. My car is designed to have constant power to the 12v cigarette outlet even when the ignition is off so I can charge at any time, and I’ve tested that doing so overnight does not drain the battery. YMMV.
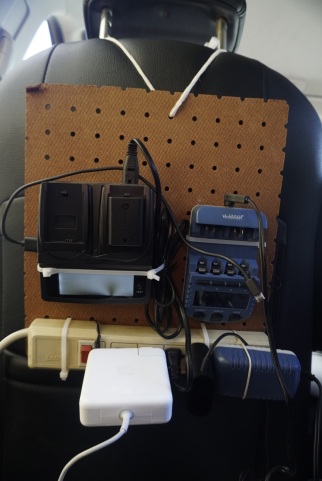
Camera, NiMH AA/AAA, cell phone & laptop chargers
Other tips: location/time-specific
- If you are going to an area towards beginning or end of a season, double-check any seasonal lodging windows – especially campgrounds. Many shut down in fall to be winterized, or open later in the spring.
- Getting an idea of the weather will help too (eg: going to New England in the fall, make sure there are no hurricanes heading up the coast!)
- If you want to get a bit specific for photo ops, look at a map and figure out which direction the light will be in various times of the day (eg: don’t shoot a barn/church when it’s in a shadow). Optimize your route to hit places at the right time.
- If you happen to be heading to New England, these lists of campsites will help!
Fall Foliage Forecasting
My favorite time of year is the fall… not only due to the great weather, Halloween and Thanksgiving but of course the colorful foliage as well. There’s a number of great locations across the country (and world for that matter) to take in the beauty of the changing colors. Over the past 2-3 years I’ve become more familiar with the areas locally to me in the Eastern Sierras. I’m hoping to get a glimpse of some of the awesomeness of early fall in Colorado this year. But in my opinion and maybe because I’m slightly biased, I don’t think anywhere beats New England. It may not have the backdrop of 10k’+ snow-capped mountains, which can certainly be stunning and worthy of it’s own pursuit. However, what it lacks up for in high-elevation jagged mountain peaks it makes up for with a stunning array of color, during a good foliage year at least.
I’ve been photographing fall foliage for several years now and very excited to have my first trip to New England during the fall since I moved to the west coast over 4 years ago. Even more exciting is that the potential for a good display is working in my favor, from the reports I’ve read. No drought conditions, good supply of moisture earlier during the summer. If we generally have sunny days, crisp nights and avoid any big wet & windy tropical systems tracking up the coast it could work out very well. I’m tracking the weather rather carefully, of course.
I’m also gathering information from a number of sources and wanted to share some of my input on what I’ve read. Some of them are quite useful, some I think a bit less so.
My personal favorite has to be Jeff “Foliage” Folger’s excellent New England Foliage blog. He provides a litany of useful information on all things fall including foliage forecasts/reports, locations, scenic drives, and more. I only found it while I was living out west, so haven’t gotten a chance to “use” any of the forecasts & reports yet but his dedication and great data resource has made my planning job much easier.
Another favorite that I’ve been using for over 10 years is the forecasts at The Foliage Network From what I’ve seen their data is pretty accurate, and detailed. It has reports only (no forecasts), but they cover a few geographical regions and provide useful maps.
A third resource is the interactive and impressive national foliage prediction map by Smoky Mountains. I was quite excited when I first saw this during the planning stages of a trip. But once I looked a bit further, the forecast seemed to be jumping the gun a bit with early peak dates based upon the two years I’ve seen so far. This year they are predicting conditions that I know are unlikely in the northeast (eg: the whole of Vermont and New Hampshire are not past-peak by the first of October). I wish I could pull up an archived page with last year’s data on it for comparison to my Eastern Sierra trip as a second data point.
I also stumbled across the reports at New England Today, and at an initial glance they seemed quite detailed. However, once you look a bit further the data was noisy… at the time I first checked, it listed a few regions marked as peak that were surrounded my regions still green, which doesn’t make sense. Since then the data seems to have been validated or cleaned up, which is great to see. This does bring up another point though…
What is peak? How do you define peak? Is it when one tree on a hillside as at “ideal” color? Or is it a majority? 20%? 30%? You know not all of the trees in an area change at identical times, local temperature variations, species, health all play into that. Furthermore, who’s to say the cutoff’s between the various foliage progression labels such as partial and near peak are similar.
I find that talking a quick search on Flickr and limiting results to the past week or so can provide some very useful data as well with a bit of luck.
Eclipse Photography
Quick note about the photography experience and lessons I learned during the recent eclipse.
Starting with the basics. In order to capture good detail in the corona, you’ll need a long lens and solid tripod. Around the order of 500-600mm or so is good (on a full frame camera), you don’t want too long as the corona extends out quite far from the sun. I used my Tamron 150-600 and it worked beautifully, in combination with a 3-series Gitzo. If you wanted to focus on prominences, diamond ring or other smaller details you could use a longer lens.
Secondly, if you want to capture the partial eclipse (anything not in totality), you’ll need a filter of some sort. I’ve read ND filters are not ideal as they typically aren’t strong enough and stacking several just adds more layers and reduces the IQ further, plus not safe for viewing through an optical viewfinder (any SLR camera) since they aren’t ISO certified. A dedicated solar filter is the right choice here. However, a proper glass filter isn’t cheap and likely something you won’t get a ton of use out of so I avoided that route and instead made my own from scratch at 1/5th the cost with an astronomy-grade solar film (ND 5.0, ISO 12312-2:2015 certified, etc).
I mounted the film to the lens using form/poster board and the great directions outlined by Joe Cali. Process was pretty simple and straightforward. There’s also terrific information provided by MrEclipse/Frank Espenak on general eclipse information, including how to photograph.
As mentioned above, you’ll use the filter to photograph any partial eclipse, and then once totality happens you remove the filter quickly and shoot more. You have to be fast as totality is *quick*, certainly feels much less then the usual 1-2 minutes. I also tried to make sure I spent a few moments enjoying the experience rather then just playing with the camera the entire time. You’ll also need to bracket as the dynamic range of the corona is rather extensive. I think I ended up using around 9 different exposures merged together in Photoshop (details to follow). If you check out Frank’s exposure guide for solar eclipses you’ll see that different solar features require different exposures. I had a bit of difficulty capturing Baily’s Beads as they are very bright, change quickly and visible for a *very* short period of time (a few seconds right before & after totality), but managed to get something usable.
I also tried a wide-angle view with a landscape in the background and a composite image during the sequence. This was pretty trivial to do, as it didn’t require a filter or any special care (the sun occupies a small part of the image and really no different then regular daytime photography shooting into the sun). However, I didn’t do a ton of planned research on locations as I was more focused on the telephoto shots and the dried-up field I shot it in wasn’t particular interesting.
In terms of processing, the best method I found is similar to common techniques handling Milky Way images. Generally, you open the various exposures as layers in Photoshop, combine into a smart object then adjust the stack mode. Some massaging of the smart object in camera raw plus a curves layer or two should be all you need to get great corona detail. A friend pointed me as this video tutorial which helps summarize things rather well.
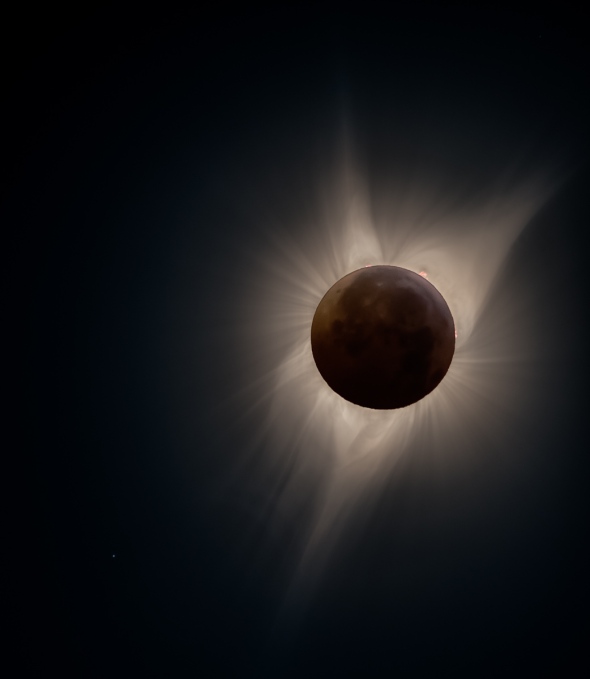
The image at the top of the post is a composite using this technique with a few modifications. I wanted to try making a composite eclipse image combining a solar with a lunar eclipse (using photos from a previous shoot) to bring up more detail in the moon itself. It took a little bit to balance things but think it came out fairly decent in the end. My favorite part of the images I captured were the prominences, there weren’t many during a period of low sunspot activity but being new to eclipse photography I was excited to see them in my images!
That about sums it up. The experience was awesome, in every sense of the word. I can’t wait to see another one in a few years!
Quick Recap – Rockies, PNW & Eclipse!

I’ve been rather busy on the road the past 2 months after finishing up in Alaska and had little time to post. It’s much harder when you don’t have an awesome driver like Jake from the Green Tortoise taking you around from place to place! Many hours on the road and hiking every day, then setting up camp and cooking dinner leave very few cycles to look through pictures, never mind write up any actual posts. I’ll give a brief summary of what happened here, with more details as separate posts a bit later.
The Alaska trip ended with a wonderful goodbye celebration in Anchorage, then a 7a flight to Salt Lake City. Kimberly picked me up en route to Colorado for a small vacation together. We spent a few days in Crested Butte enjoying the wildflower festival, then swung up to Snowmass for an evening before she got on a flight back while I continued on my trip.
Highlights included:
- MTB at 10k’ (definitely harder then it sounds)
- A few wildflower shots (significant snow still at higher elevations plus recent dry spell made for a lack of blooms in the subalpine meadows unfortunately)
- Disc golf at Crested Butte resort!
- And a special surprise for those who know us
After that, I met up with my buddy Sarah and her companion Dan (and Cleo!) back in CB for an evening, before heading off to Pike’s Peak. Then I was off on my own again to swing through Avery Brewing (awesome), Rocky Mountain NP (awesome again), then north to Grand Tetons, Yellowstone and Glacier NP! So much to see…
Then I was home for 2-3 weeks, enjoying a local camping trip with friends, then another up in Carson Pass to see the wildflowers there with Kimberly. After that, I departed on another trip to the PNW at Mount Rainier, Seattle to see friends, Olympic NP, then back down to Bend & Madras for the eclipse! A final overnight in Redwood NP before heading home the following day.
I’ll be in town for 3 more weeks before leaving on the final trip to the east coast. First stop will be a few days in the southwest seeing a few new areas and revisiting one or two others. Then a few days in Colorado to see some early foliage and visit my cousin who is lucky enough to have recently moved there. Finally, off to Vermont to catch the beginning of the foliage season there and spending a few weeks hiking and camping around. Kimberly will be joining me for a few days mid-October to see family, friends and foliage! It’ll be her first time in Vermont so I’m praying for an extra-special foliage season and for the weather to help!
Haines & The Yukon

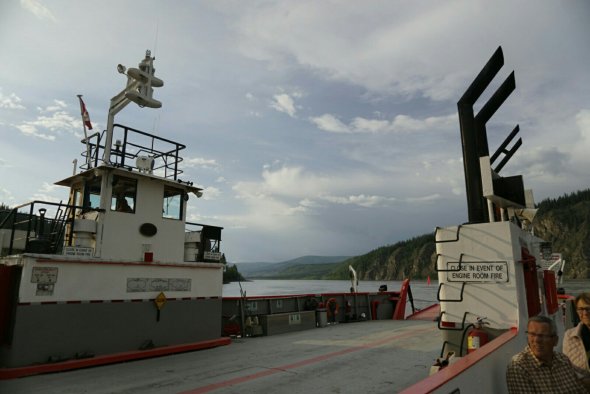
Our trip resumed with a early morning ferry departure and a mostly new set of travellers, though a few of the original group remained. Our first destination was Haines where we spent 2 days enjoying some of the local outdoors & culture. We swung by Chilkat State Park and Chilkoot Lake the first day, then set up camp and made dinner.
Ferry ride up to Haines

Haines marina on a sunny morning

Chilkat SP

One of the planned activities was going to be enjoying a local party & BBQ for a 150mi bike race that finished in Haines that evening. The salmon bake sounded like a great way to see the local community, but as mother nature had it a rare June snowstorm on the pass cancelled the event. Luckily for us, the salmon bake was still on!


The salmon bake was some of the best fish I’ve ever had and it was all-you-can-eat for $5! And as for the race, it seems like some participants didn’t get the memo as they completed the ride, in the snow, on unicycles… After seeing the route via bus it sounded like fun to me and would be a bit beyond my longest ride of 112 miles, but not in the snow!
However, the highlight of Haines and possibly the whole trip was a glacier flightseeing plane tour with Fly Drake. The pilot was awesome. The ride was epic. The views were indescribable.
It was my first experience seeing icefields and glaciers this way, and my first small plane ride. Words can’t really express the feelings of awe and even the pictures don’t convey the whole message. I captured a few shots which I’ll share here and also a few videos which I’ll have to upload at a later time. There were 4 or 5 sets of people interested and as luck had it, the cloudy skies parted just in time for my second-in-line group.


The experience was so moving and emotionally intense that my post-ride planned hike needed to be cancelled. I spent the most of the afternoon in a state of mild shock, just absorbing the raw power and beauty of the journey.
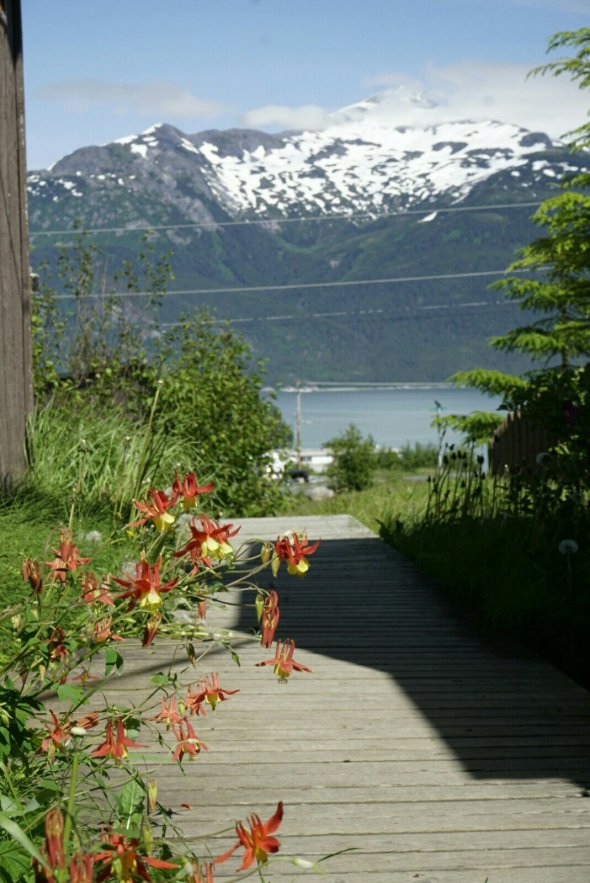
On a much more mild but also happy note, I was happy to discover my favorite wildflower growing alongside the bathroom in our campground. Back in California, I have to drive hours to the Sierras or at least get lucky with the right hike to find them (I’ve seen them once or twice up in the Santa Cruz mountains but it’s rare).
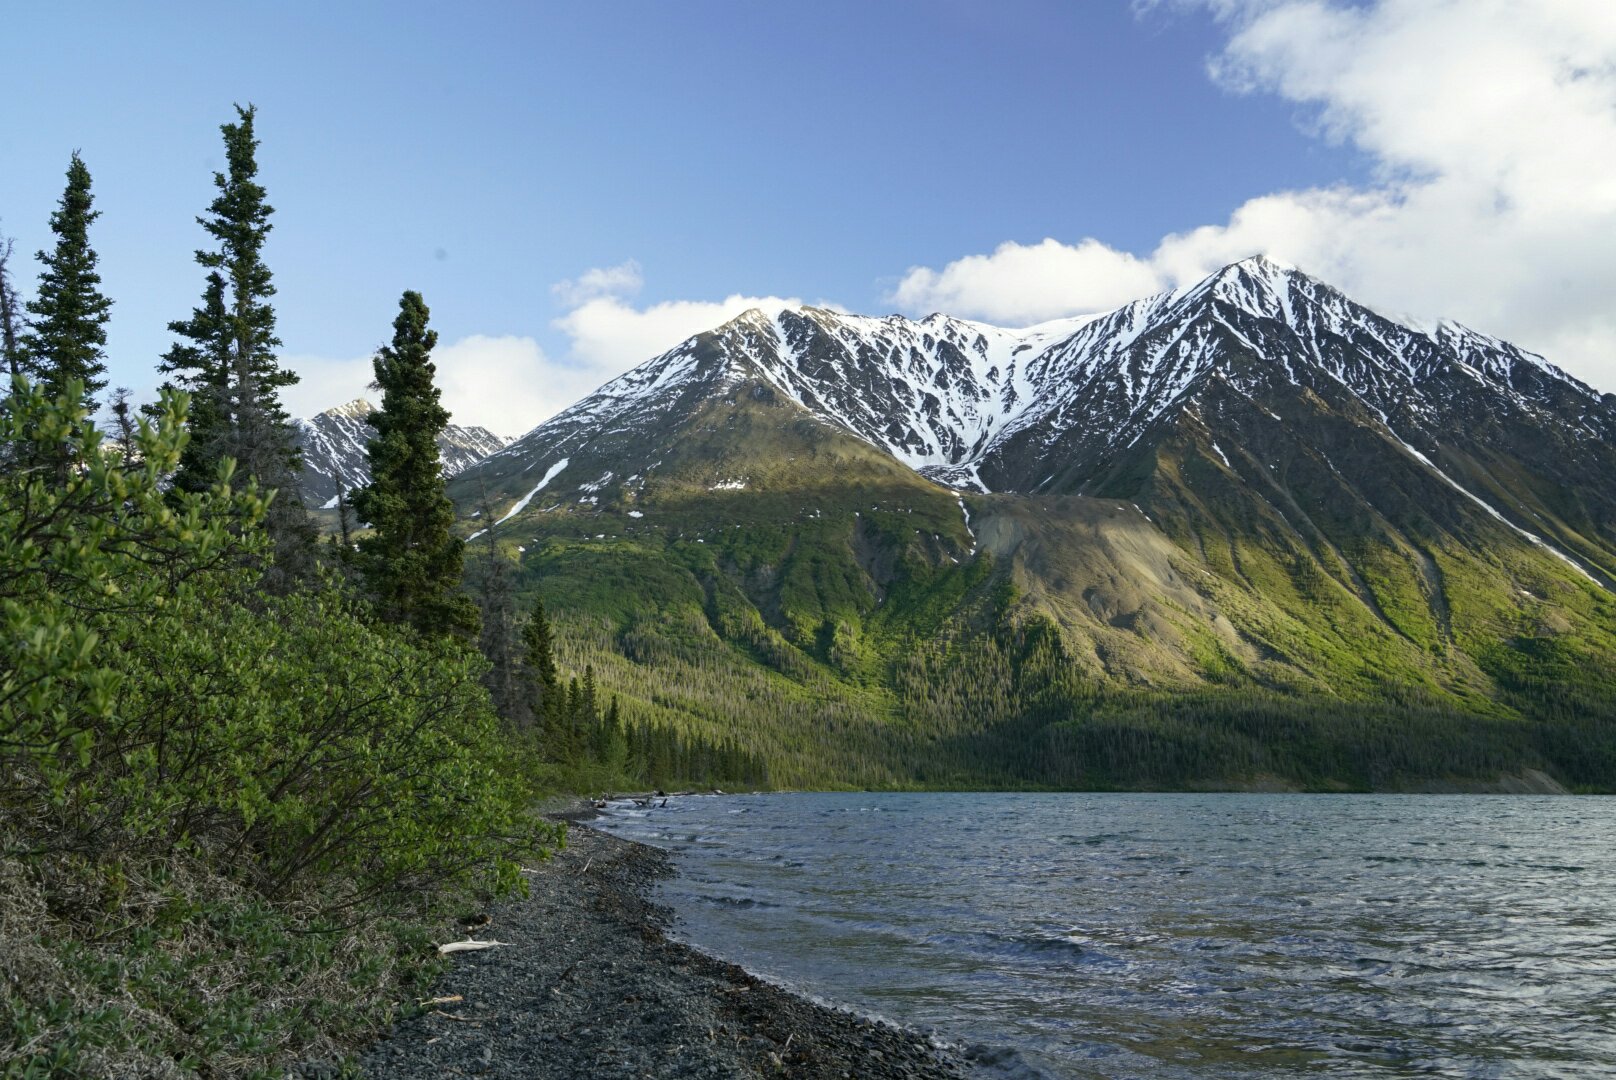
After the adventure in Haines, we headed north back up to Canada and Haines Junction in the Yukon. We camped out at Kathleen Lake for two nights and planned to tackle the crazy King’s Throne hike (8mi, 4k’ gain with 45° slopes at times!)

Kathleen Lake with King’s Throne in background
Hiking up

I made it through the loose scree fields (which were a lot easier once you found the actual trail) to the saddle, but once you headed further the intensely steep and loose slopes made me second-guess the goal of summiting. I didn’t need an ankle reinjury.
At the saddle.

Lake during an 11 pm hike. The days are getting longer as we go further north…

Next up was Whitehorse which had some much needed hot spring action. We also ran into a cyclist friend who we first met at Prince Rupert and seems to be catching us every few days!

Trying to sleep at midnight… did I mention the days are long here?

Camp pizzas for dinner

An long 8 hour drive got us into the interesting historical town of Dawson City. It was a gold rush town which kept the original buildings and facade.


We camped at a group campsite/hostel across the river which is only accessible by ferry… there is no bridge. We happened to arrive on its 50th birthday!


There was also a wildfire due to a recent thunderstorm which made for some interesting skies.

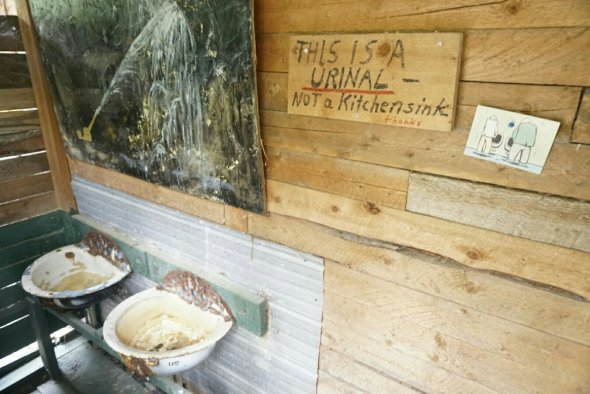
The owner of the campground has quite a bit of character in his self-built community.


I think the channel here needed a bit of tuning so I adjusted it.

Some other interesting local news while we were there… apparently the infamous human toe used in a drink at the Downtown Hotel was stolen recently and returned during our stay! Some of my friends went to the bar to try it anyway before hearing the good news, finding out they had a replacement ready. From what they said, shortly before the cocktail was prepared the toe was back in action and they were able to “use” it. Yumm!
Tomorrow we hit the Top of the World Highway and head back into Alaska! Chicken, Fairbanks and ultimately to Denali for the final destination before ending the epic journey in Anchorage.
Destination Alaska

The last visit on my previous post was an ancient rainforest as we were leaving the Rockies. A long day of driving brought us to lovely Tyhee Provincial Park, for unfortunately our last night of camping as a group 😞. The weather was warm and much clearer at these lower elevations compared to the mountains. I was eagerly checking out the clouds towards sunset… which looked promising at first but the the light stars to fade.

I saw some color in the distance and held up some hopes, but walked back towards camp. Not 5 minutes later the color came back with fury and I rushed to find a good composition as it wasn’t in a direction I had expected. Thankfully the 18 hour days this far north and near summer solstice means long sunsets. I can’t imagine what it will be like trying to sleep while camping in Fairbanks and Denali.

The next day we checked out a museum for some native tribes which was very interesting to learn the local history of the people and how they survived. Unfortunately no indoor pictures were allowed… but we did build our own human totem pole!


We arrived at Prince Rupert in the late afternoon and got busy setting up our final dinner… spaghetti! We also found a cyclist who looked hungry and tired. We had plenty of leftovers and more then welcome to share. Imagine our surprise when we told us he also left from San Francisco! Granted he has a 3 month head start but managed to make my recent 1st century and riding from south bay to SF and back seem less impressive.


The ferry schedule was changed this year and for some reason the departure time was at 3… AM. We got in line at midnight and thankfully got through customs easily and quickly… I think despite the agent’s foreboding personality our converted bus with a huge group of passed out travellers laying together in sleeping bags on a platform took him off guard. We departed on time and I couldn’t help but explore a bit before hitting the sack.

Next morning was early as I didn’t want to miss any of the views. The lack of sleep caught up with me in the afternoon though and a nap with a nice view as in order.


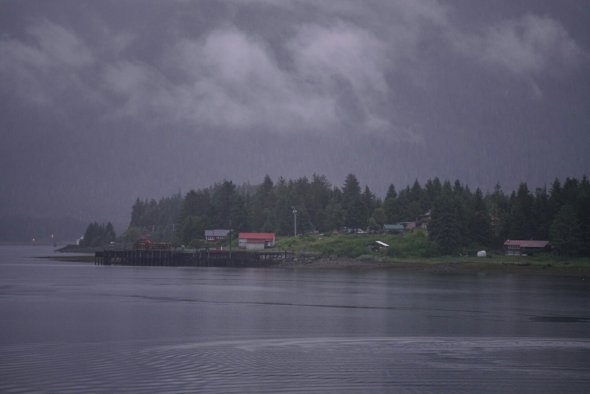
Approaching Ketchikan.

The previous days beautiful weather started to change to the more typical southeast Alaskan climate.

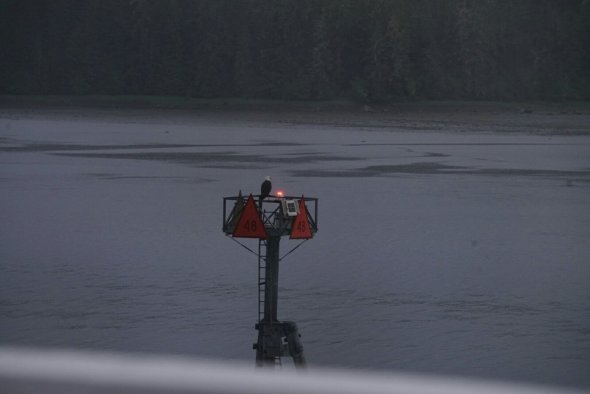
I heard bald eagles have quite a healthy population, but I didn’t expect them to be more common then pigeons.

After a 30 hour ride and several stops, we finally got to Juneau. Quite a trip. I was especially impressed with the scenery towards the end of the ride as it was more rugged. You can easily see the Mendenhall Glacier as the boat approaches town. I’ve heard our final leg tomorrow to Haines will be just as good, if not better.

Thankfully we got off the ferry first (at 5 am) and were able to do breakfast as a final group meal but with a pretty crummy view at Eagle Beach…


Group shot!

But I think the late nights/early mornings made a lack of faith over the weather conditions disturbing for some…

Oh well. I was happy to find lupine all over the place and tried not to fall to the dark side myself. Our final day excursion as a collective group was to the Mendenhall Glacier to do some short day hiking. I wanted to get up to the caves but knew it was a long hike and learned through research it’s not the simplest or safest hike due to unmarked trails, extremely loose scree slopes and falling rock & ice dangers in the caves themselves. I instead booked a guided trip to visit the caves the following day.


And with a bit of exploring, I found lupine on the lake shore with a view!

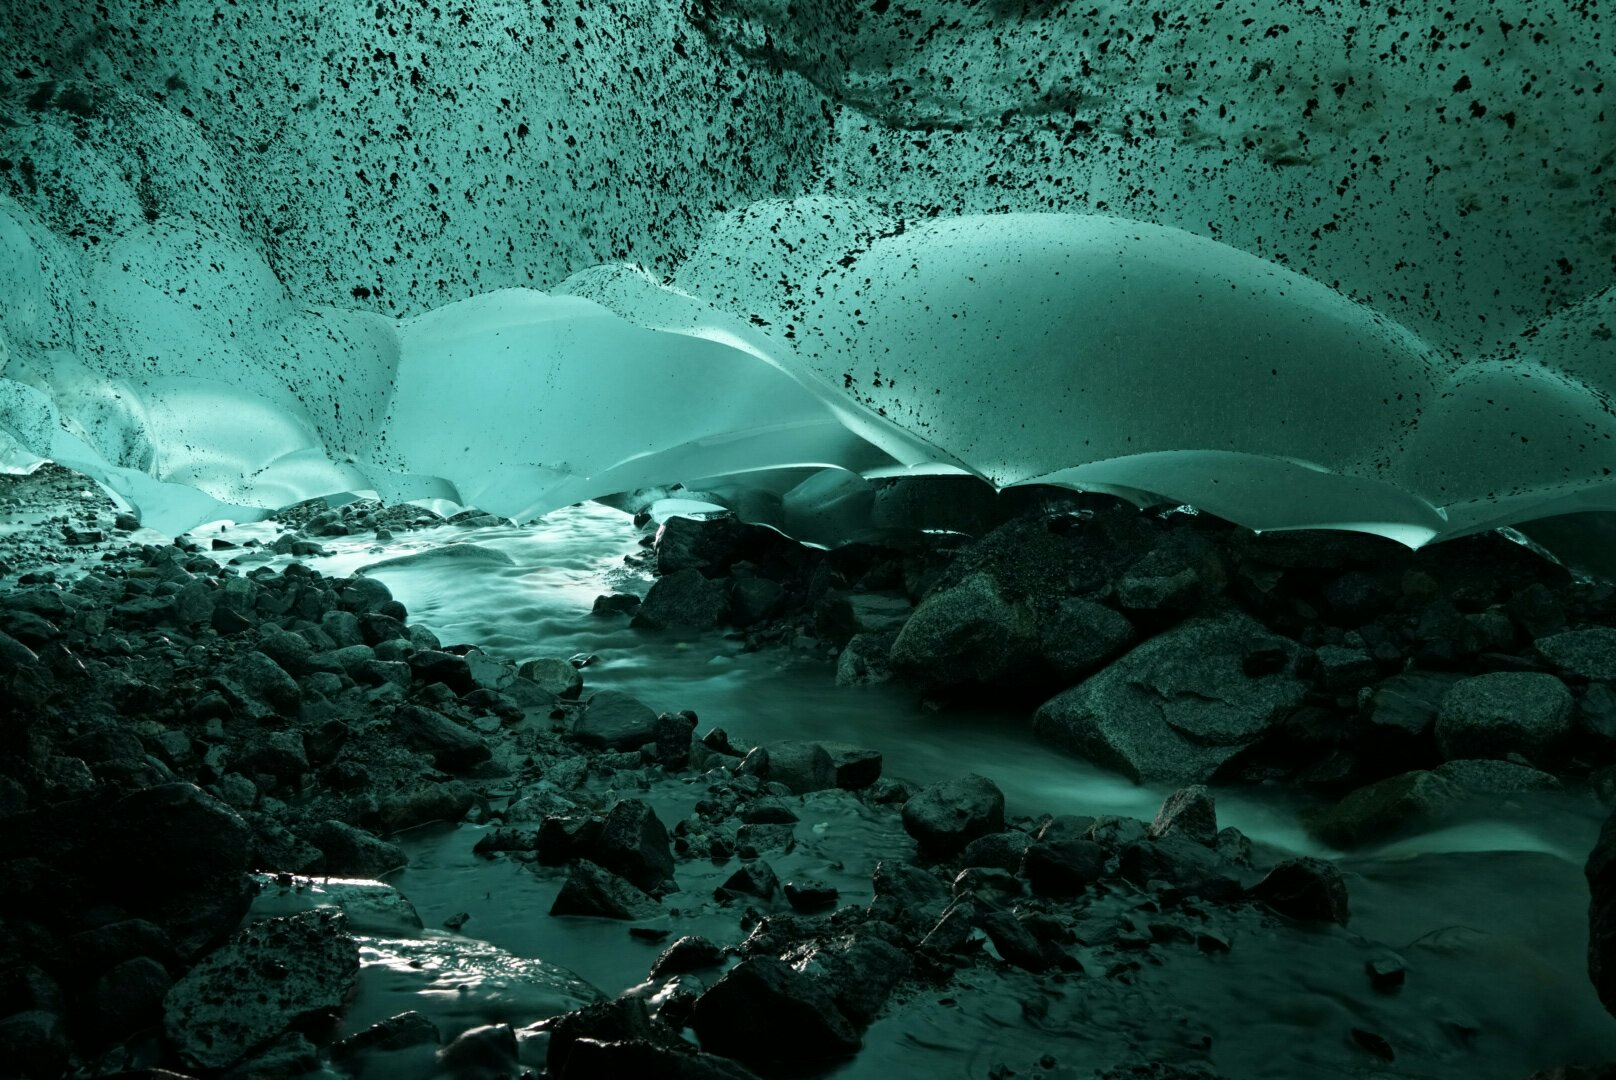
That evening I checked into the Juneau Hostel which overall was nice, but a curfew and being shut down during the day made it a bit less then ideal. The next day I split a room at the Alaskan with my new friend Noah which made it not that much more expensive then the hostel and way more convient as we had group plans most evenings at the next door Alaskan Bar. I was up really early the next day to verify my spot on a canoe/glacier trek/ice cave tour with Liquid Alaska Tours (Juneau Mendenhall Glacier Ice Adventure Tour). The guides Paul & Griffin did an excellent job on the trip. We canoed 2.5 miles across the lake, donned crampons and did a short walk on the glacier itself, then swung through caves on the way out.


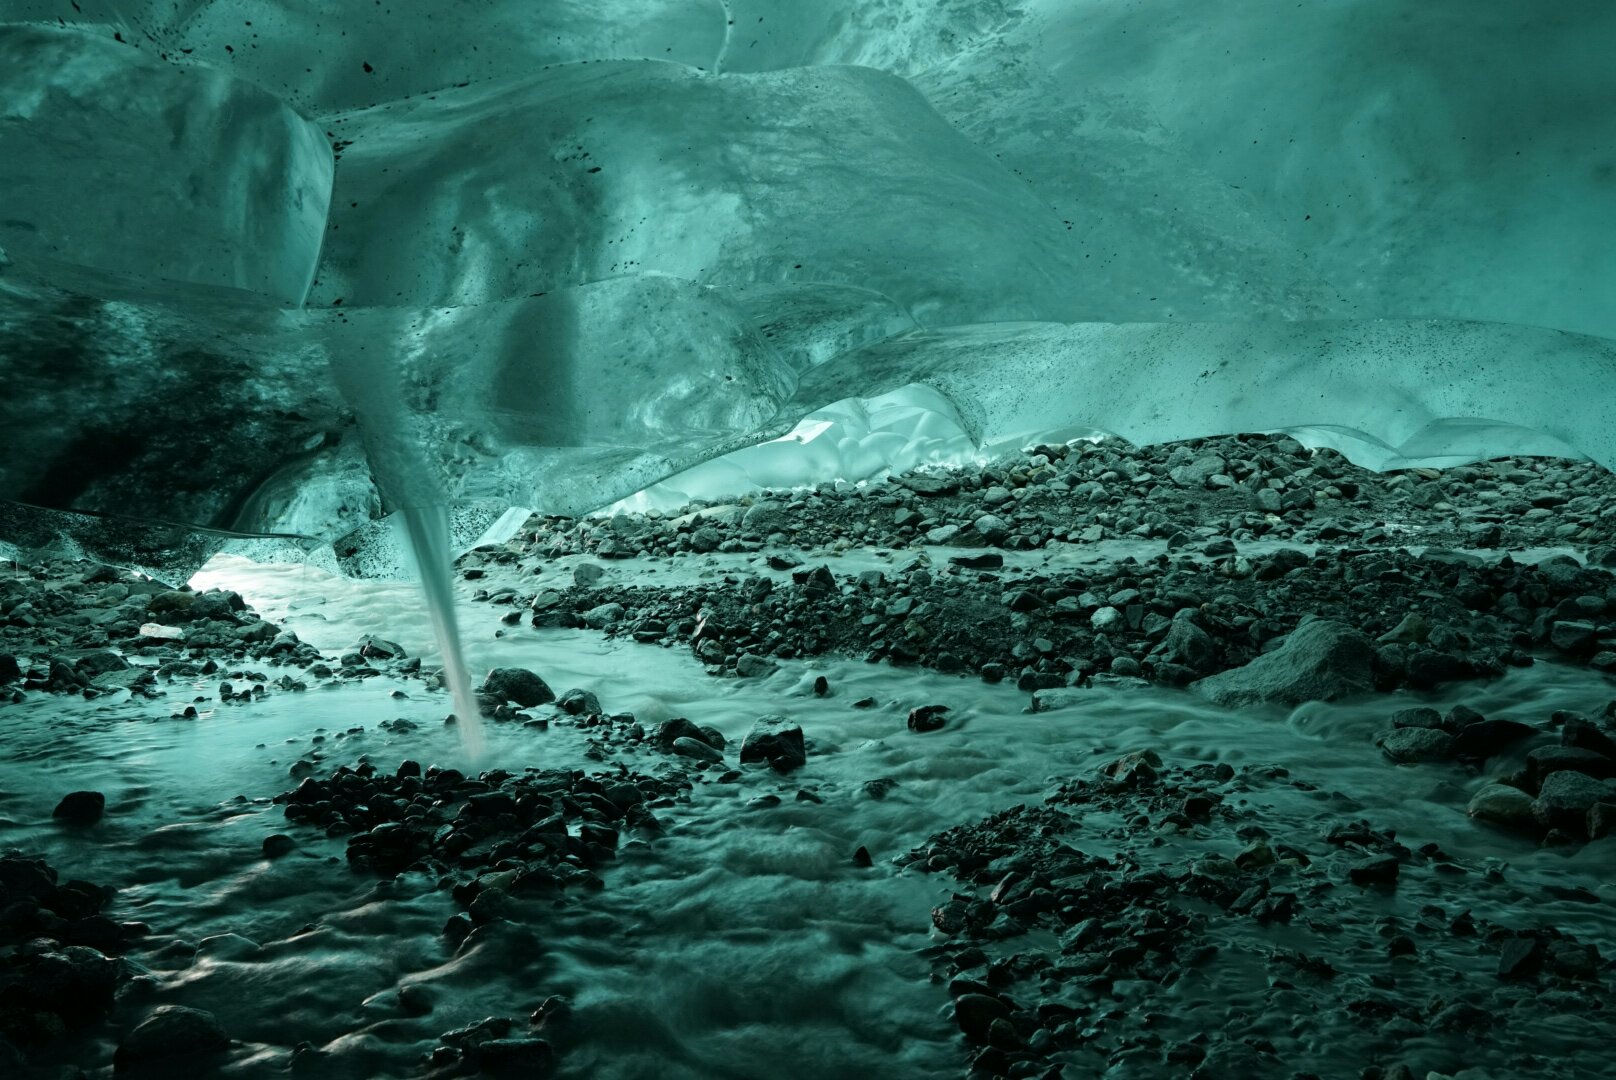
The glacier walk was short but fun, you can’t get too far on it before the safety level goes from “ok this isn’t too bad” to needing a quick change of underwear. The glacier is extremely crevassed with the rapid melting of 1.5 feet/day! We didn’t rope up or anything and you could certainly get further with the right gear and experience. Honestly I was more worried about being on the lake… the guides said they’ve never had any issues or anyone go overboard, but if somehow the massive 16 person canoe managed to tip over it would be very serious as the water stays around 37-40 degrees year round and rescue would likely take way too long. They take safety seriously though and have cancelled several trips if the water isn’t calm and conducive to being on. As for the I’ve caves… I’ve seen pictures before but experiencing it in person was epic. I can’t describe in words what the crazy lighting and patterns the interior of a glacier looks like.


We even got to see the business end of a moulin!
With my photography passion, I could have spent hours in it but we had a schedule to keep. After seeing the logistics and getting GPS data for the trail I feel pretty confident I could handle it myself which I may do at some later point. I would advise against going on your own unless you first do a guided tour, or are experienced with ice caves and glacier traversal. Paul mentioned that several people a year are rescued due to trying this and being ill prepared.
Once I got back to town, I had a victory lunch and walked around town.


I managed to find a small church with my favorite wildflower growing in the garden. I’m used to needing to drive hours to the Sierras at the right time of year to find these blooming, not in some front yard!


Yesterday wrapped up with a final goodbye for all the people heading out and not staying on board for the second half of the trip. We are now such a tight family in such a short period of time, I had to idea starting this journey and it caught me totally off guard. It was a wonderful and life-changing experience and I’m happy that at least Jackie and Joe live close enough to feasibly plan weekend camping trips and whatnot. I hope with the new people we get and a few of the existing crew sticking and around we can keep some of the energy and camaraderie but doubt it can match the level of what we had. We also can’t forget the nearly perfect job that our driver Jake and guide Laurel both did.
Noah contemplating his existence before performing his love song at open mic night..
I think we lost a pint glass here and had to improvise.

Some other random things: the game of choice on our trip. New to me and a word game I actually really enjoy!

This piece of my gear got more use during 2 weeks in Canadian Rockies and Alaska then 2 years of living in Cali and all my Oregon trips. Hardshell ftw. Think it needs a new DWR application though.

And unfortunately there was a casualty… somehow the normally bulletproof Nalgenes didn’t survive a fall out of my backpack getting off the bus.

Changing of the guard ceremony and bidding adieu to my old faithful nalgene adorned with Patagonia memories.

Tomorrow starts the second leg of our journey. I’ll miss everyone who had to go, but excited for a group a great people left, meeting new people and getting to see the Yukon and rest of our Alaska destinations! Until next time!
Operation Alaska
Summer plans have been in flux for the past few weeks, I was home for most of May to have PT for the ankle which has mostly worked. I had thought of heading to Banff for June, but after some research showed it’s their wettest month with days of rain at times, I changed things around. Oregon had plenty of that in April and I didn’t fancy the idea of driving to Canada and sitting again in a wet tent the whole time.
I discussed this with Kimberly and she mentioned an idea – there was an outdoor-oriented tour company Green Tortoise she went on a trip with to the southwest canyonlands a few years back and had a lot of fun. I checked their website and they had a 27 day trip to Alaska that still had availability and a good price! It didn’t take much time to realize this was going to be my June… I always wanted to visit Alaska, but heading up there by myself would be an awful lot of driving. The trade-off of flexibility in this case seems worth the ease of travel and sheer amount of places that will be visited, plus it would be nice to have some companions on the road.
A few of the highlights:
- Banff & Jasper ironically enough so it seems I’ll be seeing it June after all
- Ferry ride through the Inside Passage
- Juneau – Glacier Bay National Park, Mendenhall Glacier
- Kluane National Park
- Denali National Park
- Too many hot springs to count
So much to see, hoping to come away with lots of memories, great photos and maybe some new friends. While on the tour, I’ll have limited equipment (no laptop) but hoping to be able to capture some quick snapshots that I can share. One of my goals of heading up to this region is aurora photography, but this time of year is not ideal due to the extremely long days and limited darkness… next time!
After Alaska, it’s off to Colorado in early July for some high-altitude wildflower hiking and then some combination of Yellowstone, Tetons and Glacier National Parks before heading back home.
Homemade Pizza

I’ve been working on bringing up my pizza game lately and think I have it mostly nailed down to a point where I’m satisfied for now. There were a number of learning lessons over the years, and while it’s fun to improve things having your hard work (and dinner!) turn to a pile of mush is frustrating.
I keep my recipes in Pepperplate and just finally got around to writing the recipe down and typing it up… usually everything is eyeballed and trying to remember what worked & didn’t from last time. I *think* that anyone can see my recipe if they have an account (if so it’s here – http://www.pepperplate.com/recipes/view.aspx?id=20046722), but for everyone else I will put the information below.
Next steps will be trying dough from scratch. This will probably be tackled with homemade pasta attempts 🙂
(Mostly) Homemade Pizza
Ingredients
Dough
- 2 x 16oz pizza dough, I use premade ones from Trader Joe’s
- Cornmeal or my preferred approach, parchment paper
- Pizza stone, baking sheet may work with adjustments
- Pizza peel or extra baking sheet for prep and sliding into oven
Sauce
- 1 28oz can San Marzano tomatoes (way more then necessary, but I save leftovers for pasta)
- 1 tsp dried basil
- 1 tsp dried oregano
- 1 tsp garlic power
- ~1 1/4 tsp salt (30 turns of large salt grinder)
- ~1 1/4 tsp fresh ground black pepper (ditto)
- 1 tsp sugar
- 1/8 tsp baking soda (optional, to cut acid)
- Extra virgin olive oil
- Blender, preferably immersion
Cheese
- 1 block of whole-milk mozzarella (16 oz)
- Cheese grater
- Mandolin, optional
Toppings
- 1 onion, sliced thinly (1/8″)
- 8 oz packaged mushrooms, sliced thinly (1/8″)
- Sun-dried tomatoes, sliced
- Fresh basil
Instructions
Preheat oven to ~450. Place pizza stone or baking sheet in. Warm up oven for at least 45-60 min (especially if using a stone, maybe even 90 min).
Sauce
Empty tomatoes into bowl. Add generous amounts of olive oil, I typically pour my bottle for about 5 seconds. Add dried herbs & garlic. Add salt & pepper, the amounts I used are guessed, typically about 30 turns of my salt and pepper grinders. Add sugar and baking soda if desired. Blend everything with immersion (or other) blender until well mixed. Adjust to taste as preferred. Set aside.
Cheese
Grate cheese, place in bowl. 16oz package will be enough for 2 pizzas.
Toppings
The toppings are up to you, but this is what I prefer. Whatever you use make sure they are sliced thinly, especially moreso for any meat.
Peel onion, slice cross-sectioned thinly to 1/8″ (a mandolin makes this easy). Do the same for mushrooms (mandolin works less awesome on these) and other ingredients. Set aside each topping into an individual bowl.
Dough
Remove from refrigerator and place in bowl or on floured surface, cover with towel and let rise at least 2, but no more then 4 hours.
Once ready to start, place a dough ball on floured surface and press out with fingers going around a few times until enlarged. Once bigger, pick up dough and hold up with both hands closed to fists, working your way around the dough. Let gravity do the work to stretch it out. Form a crust ridge on the edge of the dough if not already here. Place on pizza peel or baking sheet with either parchment paper or cornmeal underneath (this makes it easy to slide off onto stone in oven). This video was helpful to me https://www.youtube.com/watch?v=lz-Yr1q-fKM
Spoon out no more then 1/4c sauce onto dough; less is more. Use back of spoon/ladle to distribute evenly. It’s very important that a small amount of sauce is used – it should be very thin coverage; otherwise you’ll have a soggy mushy puddle in the middle of your pizza which is unappetizing. For TJ’s 16oz dough formed to a thin crust a little less then 1/4c works perfectly.
Add grated cheese. You can be more generous here, don’t go crazy but full coverage over the pizza is basically what you want.
Add toppings. It’s important these are thinly sliced as they will cook in the right amount of time and also not cover up the pizza from receiving heat to melt the cheese.
Slice pizza off peel onto stone, or sheet onto sheet, etc. Use of parchment paper or cornmeal makes this trivial. Cook for ~12-15 min or until cheese starts to brown. You should also check the bottom of the dough by lifting along the edge with a spatula. It should be brown and the dough should be solid, as in not bend in half when you lift an edge.
Remove from oven and let sit for 5 minutes.
Notes
The key things that brought my pizza game up to the next level were the use of parchment paper, whole-milk mozzarella and a minimum amount of sauce. I’ve had many pizzas-turned-to-calzones as they refused to slide off the peel and collapsed into a pile. Part-skim cheese just doesn’t taste the same way and seems to have an odd texture and look when it cools. And I’ve had several pizzas that were soggy in the middle because of too much sauce. Luckily, a fix is easy; if a puddle of liquid seems to form, take a paper towel, roll into a small cylinder and blot/soak up the extra liquid with the tip. If you catch this before it’s too late it works fine, usually it forms when the cheese begins to melt.
Columbia River Gorge


It was wonderful to spend more time in the gorge. The wildflowers were beautiful, the orchards were blooming, and of course the beer was delicious. Old ranches, unique wineries, ice caves and low snowlines were among some of the other interesting things encountered.
As per usual, there was another low moving through the morning I left Bend which made for some nice clouds and light rain driving north. Once I hit the Mount Hood area though, it turned to an all-out blizzard. I had considered stopping and snowshoeing into Trillium Lake, but wanted to get to the Hood River Valley to see the blooms instead and not knowing the expected amount of visitors for the first sunny weekend in awhile – procure a campsite for a few days. Kimberly was flying in that evening to join me for the weekend. An unfortunate flight delay changed our plans of hitting Cascade as the first stop, but instead we crashed at a PDX hostel, swung by Pip’s Doughnuts for some tasty breakfast and superb chai, then off to camp to drop things off and check out Dalles Mountain Ranch. The flowers were awesome and we even had a (hazy) view of Hood. We picked up a copy of Curious Gorge for excellent reference material (Kimberly used NZ Frenzy on a previous trip and enjoyed it), but unfortunately a number of the places we initially chose in Washington were unreachable due to the low snow levels around Mount Adams. However Panther Creek Falls and Trout Lake Ice Cave were both terrific. An obligatory stop at Cascade plus dinner-to-go at Pok Pok while en-route to PDX to drop her off finished up the visit.
Back to exploring on my own! There were some wonderful clouds one morning as a layer was breaking up in the sun, so I headed back to Dalles Mountain Ranch and got some shots of the rusted car and ranch with big puffy clouds looming overhead. On that note, I wanted to mention that although it was my first visit to this special place, I’ve seen photos for years now. The flower blooms surrounding the car look quite degraded compared to previous years, a thought a local photographer has unfortunately confirmed. It’s great to capture nice shots, but not at the expense of ruining a place for everyone else.
Being on my own didn’t last long either, as a fellow Escayper was coming out for a short visit. We swung by Panther Creek (I wanted to find an easier way to get down to the base of the falls rather then climbing down on slippery rocks), Wahkeena and Upper Latourell falls over 2 days. I had also decided to “quickly” shoot at Rowena Crest one morning right after sunrise and while wandering along a trail, I had done most of McCall Point before I realized it. A bit more then I intended before breakfast and coffee! My buddy and I also shared dinner one night and since he was interested in some local breweries I introduced him to a favorite one I found: pFriem. Another excellent lineup up sours, blondes and the like.
Now back home for a few days. From here, uncertain. I’d like to go back to the PNW to visit a few more areas. But I also am considering meeting up with my friend Sarah in Utah. Glacier NP and Banff are on the agenda for June, but May is up in the air. We’ll see what happens!
Bend
I’ve visited Bend a few times before – enjoying backpacking in the sisters, climbing at Smith Rock and visiting some local breweries but knew this place had a lot more to offer. Doing some legwork revealed a number of interesting photographic opportunities with a few miles of snoeshowing… however, the weather didn’t quite cooperate. It seems like the upper level trough pattern has continued through the winter and into the majority of April, bringing in system after system into the NW (including a shit-load of snow in Tahoe, if you haven’t been paying attention). There’s a few shots, but nothing that seemed awesome at the time and have yet to download.
Most of the time the past few days have been spent exploring the local countryside for good photographic compositions, camping, a fair amount of coding, and today a visit to the slopes of Mount Bachelor. Still unsure how well it would go with the ankle still not back 100%, I headed up the lift. Overall I consider it a success – I was certainly not at my usual level of ability, but I did a number of runs without injury or significant pain; things improved a bit after a warmup run and stretch. Plus I got to see Bachelor, which was a far bigger mountain then I had initially realized and pretty awesome considering it’s proximity to town. I wonder how crowded this place gets on the weekends in peak season…
Other things included a obligatory visit to Deschutes, along with a few new ones. My favorites by far, were Crux Fermentation Project and Immersion Brewing. At Immersion, I can’t recall the last time I had a Belgian strong and actually really enjoyed it. On top of that, all of their other styles (oatmeal stout, saison, pale) were solid deliverers. I don’t know too many breweries that can offer similarly-constant performance across this wide of an array. My only disappointments were that I just missed the short-release sour by a few days (will have to visit Cascade to rectify) and the fact they don’t bottle or distribute! I could get a growler, but a lot of good that would do sitting in a car while camping… it’s not that cold here during the day. Apparently they are a few player to the scene and plan to bottle within a few months. I’ll be keeping my eyes peeled. And as for Crux, they have such an interesting array of barrel-aged brews and saisons (sometimes both) that words simply cannot describe. So much character and unique flavors.
Next stop will be hopefully some nice wildflowers at the Columbia River Gorge… it seems peak bloom is right around the corner and with good sun finally in the forecast for awhile, it will be fun to find out and explore.
Sprained Southwest & the Future
I recently went on a photography workshop with Marc Adamus to the Southwest as he’s been one of the photographers who’s work I admire greatly. The workshop itself was a lot of fun; I had never previously been to the Southwest so having such a knowledgeable and dynamic guide as himself was quite an experience. There was a lot of driving, waking up for sunrises and shooting of course. We went everywhere from Zion, slot canyons, Sonoran Desert complete with cholla (they are quite good at pricking you), to Death Valley. I’m still going through all of the photos and have barely edited any yet.
Unfortunately there was a bit of an accident on the trip, I manage to sprain my ankle being a bit careless while running down a hill to get more photography gear. It’s mostly healed at this point, but still a little sore. However, a bigger change was in the works.
I’ve decided to focus my life (for at least a few months) on travelling and photography full-time. It seemed like the right opportunity as being with my previous employer for almost 4 years and wanting a change, plus personal life planning and choices in the not-too-distant future may prevent this sort of experience from happening (at least for quite a long time). I won’t belabor all the downsides to this decision, but I will say that I will miss many of my colleagues and consider myself very grateful and lucky to have the experience and benefits I had while working there.
So, while my official last day is Monday I do consider the start of my travels as of today with a weekend trip to Antelope Valley and Carrizo Plain to enjoy the incredible wildflower blooms. There’s been some mixed reports on whether this is a rare super-bloom or not, I think a lot has to do with location and types of flowers involved. Death Valley had one last year, so this year was supposedly less; I only saw a brief area on the workshop as had to leave early with the injury. However, from the pictures I’ve seen some (if not many) areas in the area are simply breathtaking.
Once we return, I will swap out a few items in the car and then head out the next day with likely a return to SoCal to either revisit these areas or possibly see others that may still be in bloom – a few, such as Anza-Borrego (reports here) are already past-peak, so will probably focus efforts on others. From there, a drive up to see more of Death Valley, up through the Eastern Sierras making my way to Oregon to see the wildflower blooms along the Columbia River Gorge. I’d also like to visit Mount Bachelor and spend some time snowshoeing around Sparks Lake. After that, who knows. Olympic National Park, Yellowstone, Banff, Colorado and revisiting other areas in the southwest are all possible options.
Patagonia Memories
As a follow-up to last evenings’ thoughts, the soup ended turning out quite well and really lacked any sort of burnt taste. My fears were thankfully misplaced! The richness of the pork base made for a nice hearty meal on a rather cold evening here in the bay area. It reminded me a lot of the delicious locro on last year’s Christmas trip to Patagonia, and how much I wanted to try an attempt at it myself when I returned.
A few other thoughts on tweaking the recipe further:
- Recipe called for adding onion and celery into the stock as-is (uncooked). Onion in particular has a wonderful flavor if browned a bit, wondering if that would improve anything significantly.
- Added some stout while cooking (~1c?). Hard to say how much of an impact it had, but seemed like it would fit well.
- As mentioned, the pork-base is nice but wondering if adding lamb or other additional meat would help, or just overpower things.
A few promising recipes popped up after a quick search on locro. Maybe I’ll try one of these next.
Rauchsoup
Cooking. One of my other favorite activities, when I’m not in the outdoors or shooting some of the wonderful scenery available on the west coast. I personally believe (and others have agreed) that I make a rather solid from-scratch-chicken soup thanks to an introduction of the art years ago by my friend Brian.
As much as I enjoy preparing and eating my chicken soup, it’s a ton of work. And I need to branch out more to expand the repertoire. So when a dry bean-ham soup package appeared on the shelf at TJ’s the other day, figured it’d be worth a shot. I almost never cook pork at home (asides from the occasional bacon and sausage splurge) so it’d be something new. The recipe called for simmering ham hocks for 3 hours with beans, then adding the rest of the ingredients. I’m a big fan of braising with chicken and beef, so why not continue the practice as a preliminary step?
It’s still too early to confirm, but not so convinced it was the best idea. While the stock tastes OK at the moment, the aroma gives off a strong smell of burnt. Reminds me heavily of rauchbier, which I enjoy but in very tiny quantities. Hope I’m being a bit too critical and after cooking in the rest of the ingredients it will come out well.
Fall Photography
Fall is my favorite of the year. Overall it’s the best season in my opinion, not only for weather but especially for photography… surpassing the beauty of late summer mountain wildflower blooms and snow-capped winter scenes only slightly. This year I had planned to head back east and visit New England as I had done for years while living on the east coast. Extensive research was performed into specific locations, this trip was to be substantially longer duration then my typical extended-Columbus Day weekends. It was a bit overwhelming, but also a lot of fun to learn more about spots I have not yet gotten a chance to visit.
However, the weather didn’t look to be terribly good. And I was keeping a close eye on Matthew… at the time many of the models were predicting a brush or even direct landfall in the region. Since my plans were to be mostly camping and backpacking, the news was less then ideal. I’m certainly familiar with the difficulty in predicting tropical storms, this one being particularly difficult with the weak lows and steering currents influencing it’s direction (or lack thereof).
Last minute, I decided to cancel/change the trip as it just didn’t feel right to me. I had briefly toyed with heading to Colorado but to research areas would have taken too long and based on their weather, several of the interesting passes were closing or already shut down. Instead, I headed out to a more local spot and spent time getting better familiarized with the eastern Sierras. Since they are so far from the Bay Area, I had first visited as far south as Bishop only recently on a Kearsarge to Whitney backpacking trip over Labor Day (that deserves another post itself) and explored the more well-known canyons only briefly.
Overall the trip was quite enjoyable. Some aspects were great, some less ideal. Next year I definitely plan to execute on the New England trip, or possibly Colorado instead. Both are enticing options.
Pluses:
- Now more familiar with many of the good spots. Visited several that were new to me. Got to spend more time in others. Even found one or two secret spots just by wandering around.
- Enjoyed some good fall hiking and photography during the week without the usual weekend crowds
- While I may have missed out on the extensive vibrant reds in New England, instead there were plenty of yellow & orange Aspens set against high mountainous peaks that you don’t get on the east coast.
Minuses:
- Foliage timing was a bit on the early side for some spots
- Unfortunately no luck on any shots with snow-capped peaks
- Weather hinted at snow, but instead mostly wind came which did knock off foliage in a number of areas. In June Lake loop area, even green leaves were falling off in spots, due to drought-related stress I’m thinking.
A New Experiment
Blogging. A good tool for documenting and sharing thoughts with others.
I’ve been noticing a desire recently to explore this further; not so much on my existing platform (which is targeted at Linux/sysadmin topics and hasn’t seen activity in years), but more along the lines of frequent, short “stream of consciousness” style postings. There’s still plenty of ideas along similar lines of my existing blog, which I intend to explore but many others as well – mainly focused on interests and activities of mine.
Since this is a new effort, I figured a new blog would help facilitate this. I created this account 8 years ago but have yet to use it. Now the time has come to try something with it.


")

